Before You Buy Anything: What You're Actually Building
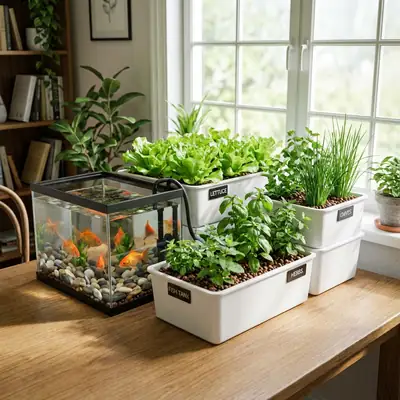
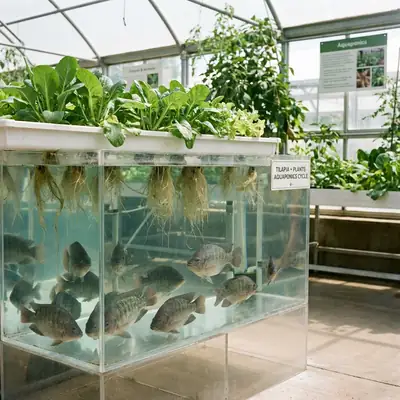
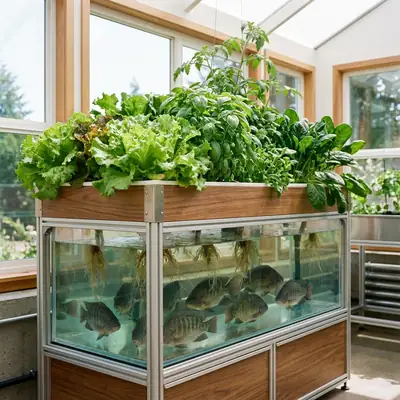
Aquaponics combines aquaculture (raising fish in tanks) with hydroponics (growing plants in water) in one recirculating ecosystem, where natural nitrifying bacteria convert fish wastes into plant nutrients. Whatever the size or budget, NMSU Extension's introduction to the subject says every system shares the same five components:
- Rearing tank — where the fish live and are fed
- Settling basin / solids removal — captures uneaten food, fish waste and shed biofilm so the fine particles can settle out
- Biofilter — surface where bacteria convert ammonia to nitrate for the plants (in media and raft systems, the bed itself does much of this job)
- The hydroponics portion — where the plants grow and take up the excess nutrients
- Sump — the lowest point, where water collects before being pumped back to the rearing tank
Miss a component and you'll pay for it later: solids that escape into the grow bed stick to plant roots and consume oxygen as they decay, which hurts both the plants and the nitrifying bacteria that need oxygen to work.
Pick Your Style First
The same NMSU guide describes the three ways plants are grown in aquaponic systems:
- Media-based — plants sit in inert media (gravel, rock wool, sand or clay pellets) in a container that floods with water from the fish side and then drains. The media gives the bacteria a huge place to live, so a separate biofilter is usually unnecessary.
- Raft-based (deep-water culture) — plants sit in holes in floating rafts above troughs of solids-filtered fish water, roots hanging straight down.
- Nutrient film technique (NFT) — shallow channels with a thin film of water trickling past the roots. Because the channels can't host enough bacteria, NFT systems definitely need a separate biofilter — a piece of hardware the other two styles mostly avoid, and one that can be expensive.
For a first build, the media bed is the common default: one bed does the filtering and the growing at once, and it suits simple pump-and-drain plumbing. This guide walks through that design; the steps carry over to rafts with small changes.
The Materials List
- Fish tank — a food-safe container sized to the fish you plan to keep (see the stocking rule below before buying)
- Grow bed — a food-safe container that can be flooded and drained; it sits above or beside the tank
- Water pump — submersible, sized to lift water from the tank to the bed and back
- Air pump and air stones — aeration is your insurance policy; the recommendation is to keep dissolved oxygen at 5 ppm or higher, and there is no risk of adding too much oxygen — saturated water simply gives the excess back to the air
- Growing media — gravel, rock wool, sand or clay pellets, rinsed clean before use
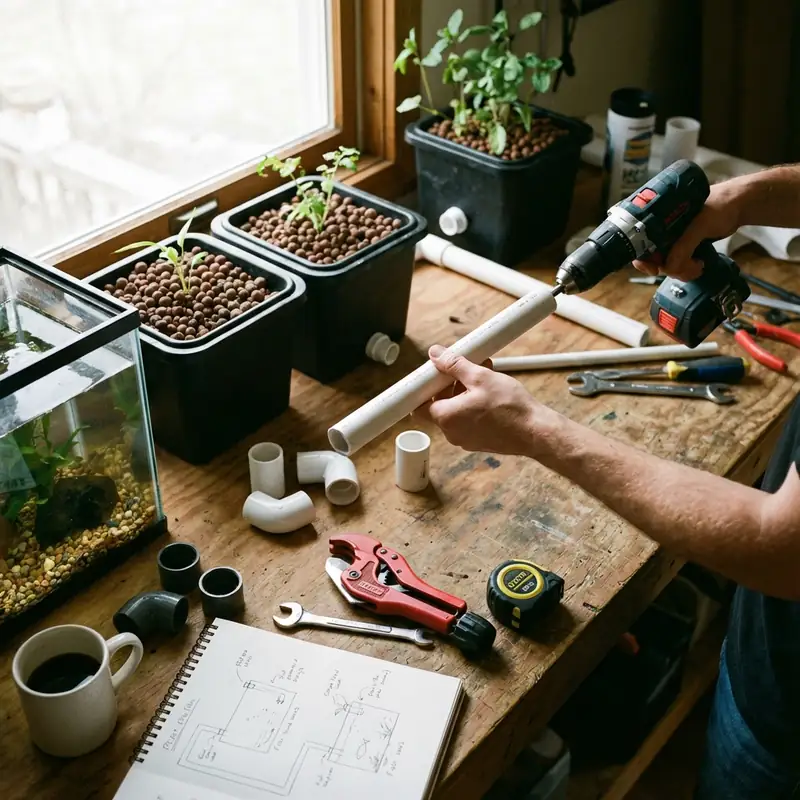
- Plumbing — pipe and fittings to get water from pump to bed, plus a drain for the bed: in the media-bed design, the bed is flooded with water from the aquaculture side and then drains, so your plumbing has to deliver that fill-and-empty rhythm
- Solids removal — even a simple settling container between tank and bed protects the biofilter and the roots
- Water test kit — for pH, ammonia, nitrite and nitrate; for most backyard systems, aquarium test kits are adequate
One more input that isn't in any shopping list: your source water. Well and municipal water are both workable, but municipal water is treated with chlorine and chloramines that must be removed before the water meets fish, and surface water is best avoided because its quality can't be guaranteed. Whatever you use, have it tested first and keep the profile — it tells you what your baseline really is.
Step 1: Set the Tank and the Bed
Position the fish tank where the floor can carry it (water is heavy), with power within reach and a water source nearby for top-offs and water changes. Set the grow bed above or beside the tank so water can flow up from the pump and drain back by gravity. Drill the drain, install the fitting, and rinse the media until the runoff runs clear before it goes in the bed.
Step 2: Connect the Plumbing
Run the pump from the fish tank up to the grow bed; water floods through the media, the bacteria in that media do their work, and the bed drains back to the tank. Put your solids removal between the tank and the bed — NMSU's water-quality circular is blunt about why: one pound of feed produces 0.25 to 0.30 lb of settleable solids, and if those solids reach the biofilter or the roots they decompose, steal oxygen, produce more ammonia and clog pipes.
Step 3: Cycle the System — the Step You Can't Skip
Cycling is building the colony of nitrifying bacteria that converts fish ammonia into nitrate the plants can use. NMSU is blunt about the order of operations: "Until a healthy community of nitrifying bacteria has been established, the cycle is not complete and it will not be possible to grow plants." Fish added before then face the ammonia the bacteria are not yet there to remove. There are two ways to cycle, and NMSU gives both timelines:
- Cycling with fish takes 4-6 weeks. Stock lightly and feed at a very low rate so ammonia doesn't build up and kill the fish you're trying to protect. Test ammonia and nitrite daily. You'll see ammonia rise, then fall as Nitrosomonas establish; then nitrite rises and falls as Nitrobacter take over.
- Fishless cycling takes 10 days to 3 weeks — faster, and with no fish at risk. You add a measured ammonia source yourself (pure, additive-free liquid ammonia or crystallised ammonium chloride — no perfumes or soaps, which harm the system) and let the bacterial colonies grow in response. Commercial liquid bacteria products can speed it along.
How do I know when it's cycled?
Not by the calendar. The system is fully cycled when ammonia and nitrite both read 0.5 ppm or lower and nitrates show up in the water. During cycling, keep total ammonia and nitrite at or below 1 ppm — if nitrite climbs above it, exchange up to a third of the water with fresh, dechlorinated water matched in temperature and pH.
Step 4: Add Fish
Now the animals earn their place. Which species you can stock depends mainly on water temperature and local rules — we compare the five extension-recommended choices in our best fish for aquaponics guide. Two numbers to start with: NMSU's rule of thumb for stocking is about 1 lb of fish per 2 gallons of water, and once the fish are in, stop adding ammonia if you cycled fishless — the fish now produce the ammonia that feeds the bacteria.
Step 5: Plant the Bed
Start with the forgiving crops. According to NMSU Extension, lettuce, basil, spinach, chives, herbs and watercress all do well on modest nutrient levels, while tomatoes, cucumbers and peppers need high fish stocking densities before they grow well — save them for a mature, heavily fed system. Our what to plant guide covers spacing, harvest timing and the nutrient supplements that pay off.
Running It: The Numbers to Keep
Once cycled, the routine is small and regular. Test daily during start-up; once the nutrient cycles are balanced, weekly testing is usually sufficient — and record every reading, because trends diagnose problems before symptoms do. The targets, all from the same circular:
- pH 6.4-7.4 (the compromise between fish, plants and bacteria; 6.8-7.0 is the sweet spot). pH declines daily as nitrification produces acid, so if it drops below 6.4 raise it toward 7.0 with calcium hydroxide or potassium hydroxide, alternating the two — both bring nutrients your system otherwise lacks.
- Total ammonia under 1 ppm; nitrite at or below 1 ppm (nitrite is outright toxic at 5 ppm, and tilapia are sensitive well below that)
- Nitrate 5-150 ppm — above 150 usually means not enough plants are growing to take it up
- Dissolved oxygen 5 ppm or higher — and remember warm water holds less oxygen, so summer is when aeration matters most
- Hardness 50-100 ppm and alkalinity at 100 ppm or above (as calcium carbonate) — hardness relieves fish stress; alkalinity is your pH buffer
- Iron — fish feed supplies most of what the plants need, but NMSU singles out calcium, potassium and iron as the exceptions. Calcium and potassium come in with the pH bases above; iron needs its own dose: 2 mg/L of chelated iron every three weeks or as needed
The one mistake that kills whole tanks
If you let pH drift unmeasured for days, nitrification can stall and total ammonia can climb past 30 ppm. Then adding a big dose of base all at once flips most of that ammonia into its toxic form — and can kill every fish in the system. Raise a crashed pH slowly, over several days.
Troubleshooting the Usual Suspects
- Ammonia creeping up after cycling — usually overfeeding, too many fish for the volume, or not enough aeration. Check the pump and oxygen first, then cut back feeding or density.
- Plants stalling while ammonia reads near zero — the opposite problem: not enough fish or feed, so not enough nutrient is being produced. More fish, more feed, or a smaller system.
- Fish gulping at the surface — dissolved oxygen is falling; add air stones or a larger pump.
- Drains slowing or pipes clogging — settleable solids getting through; NMSU names clogged pipes as one of the things solids do, so capture them before they reach the biofilter and the roots.
What It Really Costs
We won't print a dollar range we can't stand behind — prices shift and DIY builds vary too much. What NMSU's guide does say is honest and worth reading before you buy: a system can require a substantial capital investment, energy inputs and a real learning curve. The offsetting economics are real too: you produce two crops from one set of infrastructure, the plants get most of their nutrients free from the fish feed, and the system needs substantially less water-quality monitoring than standalone hydroponics or recirculating aquaculture. Compared with traditional aquaculture — where 10-20% of the water has to be discharged and replaced daily — an aquaponic system barely exchanges water at all; NMSU puts it at roughly 1% of the water a pond would use for an equivalent tilapia harvest. Budget first for the test kit and the aeration; those two protect everything else you bought.
Sources & Further Reading
- Sallenave, R. Important Water Quality Parameters in Aquaponics Systems. Circular 680, New Mexico State University Extension. — cycling as "the essential first step," the cycling timelines and the 0.5-ppm "cycled" threshold, the 1-ppm ceiling during establishment and the one-third water exchange, ammonia/nitrite/nitrate/dissolved-oxygen targets, the pH 6.4-7.4 window and the slow-base-addition warning, hardness and alkalinity ranges, the 1-lb-per-2-gallons rule of thumb, the feed-to-solids ratio and its clogged-pipes warning, and the chelated-iron supplement.
- Sallenave, R. Is Aquaponics Right For You? Guide H-170, New Mexico State University Extension. — the five shared components, the three growing styles and NFT's separate-biofilter requirement, the recommended inert media, the beginner plant list and the stocking-density caveat for fruiting crops, and the honest economics: capital and energy costs, shared two-crop infrastructure, and the 10-20% daily water discharge it avoids.